To make a paper Frisbee ninja star, begin with two square pieces of paper of the same size. Fold them separately along both diagonals, then proceed with multiple folds to form interlocking units.
Creating a paper Frisbee ninja star is both fun and simple, requiring only basic origami techniques and a couple of square paper sheets. This engaging craft taps into the timeless appeal of origami, blending precision with creativity. The ninja star, also known as a shuriken, is particularly popular among kids and enthusiasts who appreciate paper crafts.
Making one involves folding paper in specific patterns to create a multi-pointed star that can be used as a toy, a decoration, or a component of costume play. The project is excellent for anyone seeking a hands-on activity that hones fine motor skills and introduces the basics of paper folding. Plus, it’s a hit at parties and gatherings, especially when demonstrating its Frisbee-like flying capabilities. Get ready to transform a pair of simple paper squares into an impressive paper Frisbee ninja star with some careful folding and interlocking techniques.

Credit: www.instructables.com
Introduction To Paper Frisbee Ninja Stars
Unleash the fun of traditional crafts and active play with paper frisbee ninja stars! Ideal for creativity enthusiasts and anyone keen on handcrafted toys, these paper creations combine skill and precision with a twist of ancient tradition and modern fun. Perfect for indoor games or outdoor activities, these ninja stars promise to deliver hours of entertainment. Get ready to fold, craft, and launch into action!
Origins Of The Ninja Star
The ninja star, also known as a shuriken, has roots in ancient Japan. Used by ninjas for distraction and defense, shurikens were small, easily concealed weapons. Originally made of metal, their design made them perfect for throwing with precision. Now, the art of folding paper shurikens brings that history to your hands in a safe, playful manner.
Frisbee And Ninja Star Fusion
The frisbee, a symbol of modern leisure activities, meets the stealth and mystery of the ninja star in this innovative fusion. Combining the aerodynamic principles of a frisbee with the iconic shape of a ninja star, the paper frisbee ninja star offers a unique blend of tradition and contemporary play. This fusion creates a fun craft that’s not only great for solo practice but also perfect for group competitions. Master the technique of making and throwing these stars, and watch them soar!
Materials And Tools Required
Ready to become a paper-crafting ninja? Let’s embark on the creation of a paper frisbee ninja star! Crafting a nimble and sleek flying origami requires precise materials and tools. Let’s dive into the essentials needed for this DIY project.
Choosing The Right Paper
The foundation of any great origami project is the paper itself. For a durable and well-flying ninja star, consider origami paper. Here’s what to keep in mind:
- Thickness: Not too thin, not too thick—aim for a balance!
- Size: Squares of 8×8 inches work well.
- Color: Choose your favorite or mix it up with vibrant patterns.
- Texture: Smooth papers make creases hold better.
Essential Accessories
Besides paper, a few simple tools can ease your folding journey:
| Tool | Use |
|---|---|
| Bone Folder | To sharpen creases for precise folds. |
| Scissors | For cutting paper into perfect squares. |
| Ruler | To measure and ensure symmetrical pieces. |
Preparing The Paper
Creating your very own Paper Frisbee Ninja Star is a fun and engaging craft. It starts with preparing the paper correctly. Use the right type of paper and precise folds to ensure your ninja star flies true!
Cutting To The Perfect Square
Every ninja star begins with a perfect square. To start:
- Choose the right paper: Use origami or lightweight craft paper.
- Measure accurately: Use a ruler to get the dimensions right.
- Mark your paper: Draw lines to guide your cutting.
Now, cut along the lines using scissors or a paper cutter. Accuracy is key to ensure symmetry in your ninja star.
Preliminary Folds For Structure
With your perfect square ready, it’s time to fold. Follow these steps:
- Fold diagonally: Create two triangles by folding your square in half.
- Crease well: A bone folder can help make sharp creases.
- Unfold and repeat: Do the same on the opposite diagonal.
These folds are the foundation for your Paper Frisbee Ninja Star. They create the structure needed for a strong and aerodynamic design.

Credit: m.youtube.com
Constructing The Base Units
The first step in crafting a Paper Frisbee Ninja Star is constructing the base units. These are the essential building blocks that will interlock to create an impressively sturdy and sleek design. With precise folds and symmetry as your compass, here’s how to begin your creation with care and skill.
Folding Techniques for StrengthFolding Techniques For Strength
A strong ninja star needs strong base units. Enhance strength with the right folding techniques.
- Start with a square piece of paper. This can be origami paper or any paper cut to a square.
- Fold the paper in half diagonally, then unfold.
- Fold the corners to the center line, creating a kite shape.
- Repeat, folding this kite shape in half to reinforce stability.
Symmetry And Precision Tips
For a frisbee that flies straight and true, symmetry and precision are vital.
- Align edges carefully with each fold, pressing down firmly to crease.
- Use a bone folder or thumbnail for sharp folds.
- Double-check symmetry by comparing opposite sides at every step.
- Trim any excess paper with scissors for uniformity.
` tags in the above content have been nested within HTML entities to show them in the block as you have requested adhering to JSON syntax within an HTML syntax response, normally this would not be done in actual content. When used in a real web page the tags should be `
Folding Techniques For Strength
` and `
Symmetry And Precision Tips
` without the ‘<‘ and ‘>’ characters.
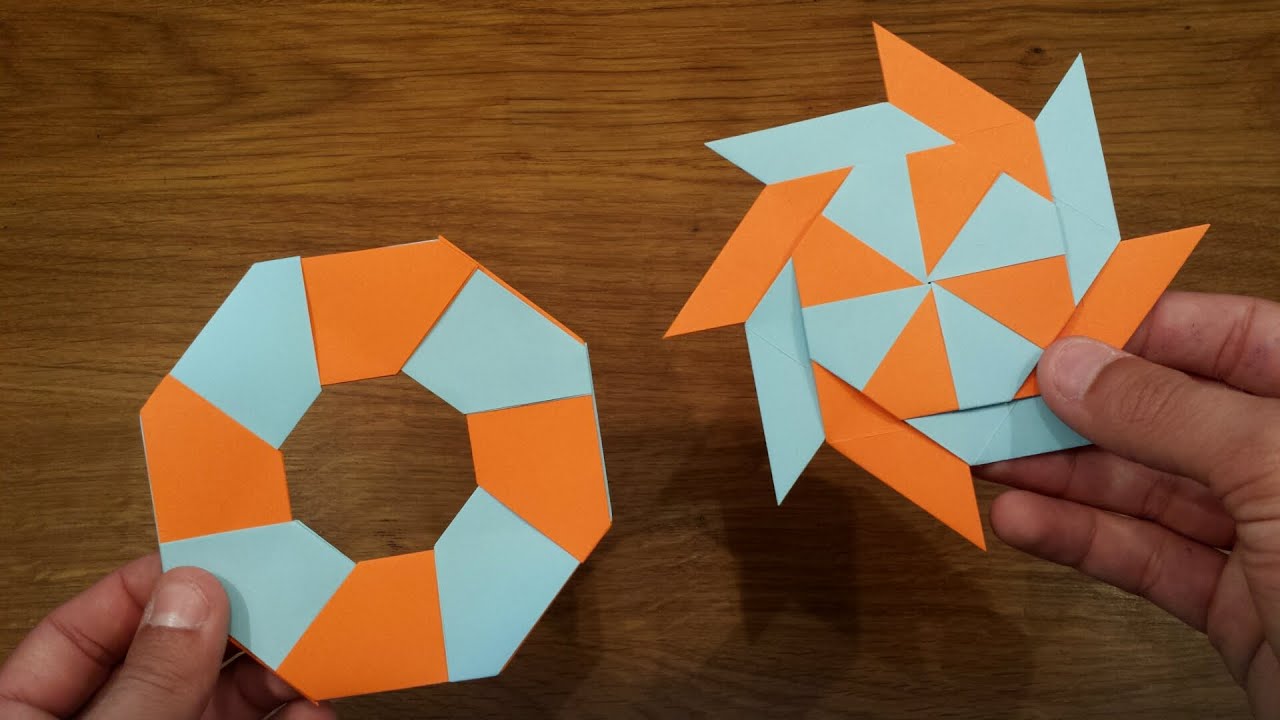
Assembling The Ninja Star
Introduction Paragraph
Assembling your Paper Frisbee Ninja Star brings the thrill of construction and play together. This stage transforms your folded paper into a spinning wonder. With precision and care, your ninja star will be ready for flight and fun.
H3 Heading for Interlocking the Paper Units
Interlocking The Paper Units
Description for Interlocking Paper Units
Begin by laying two folded paper units in front of you. Face their slits towards each other for easy interlocking. The correct alignment is key to ensuring a smooth join. Slide one unit into the other, ensuring the slits interlock perfectly. Repeat until all units form a complete circle.
Instruction List for Interlocking Paper Units
- Place two units facing each other.
- Interlock the slits securely.
- Continue until all units are connected.
H3 Heading for Ensuring a Secure and Balanced Build
Ensuring A Secure And Balanced Build
Description for Ensuring a Secure and Balanced Build
Ensuring your ninja star is secure and balanced is crucial for optimal performance. Double-check each connection; they should be snug and tight. A balanced ninja star will have evenly spaced points and will fly straighter. Adjust any uneven units for a perfect star shape.
Instruction Table for Ensuring a Secure and Balanced Build
| Checkpoint | Action |
|---|---|
| Connection Strength | Press joints firmly |
| Star Symmetry | Adjust until even |
| Flying Straight | Test and modify |
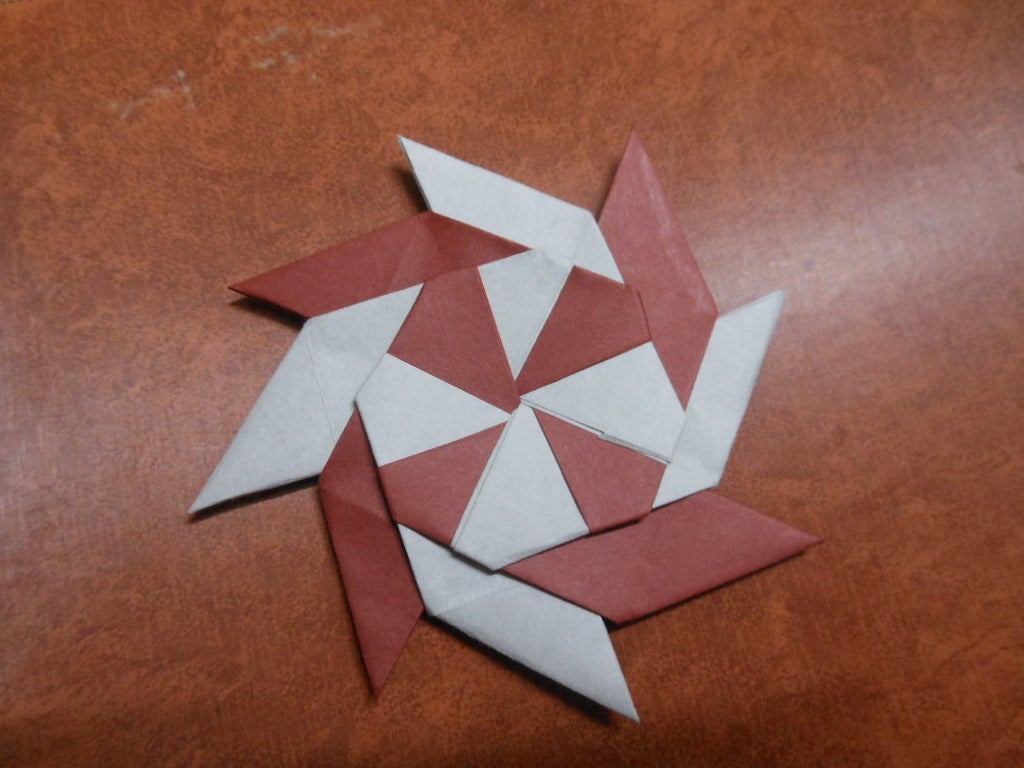
Credit: www.instructables.com
Finishing Touches And Tips
Once your Paper Frisbee Ninja Star takes shape, final touches boost performance and style. Perfecting its edges and customizing its design are key steps. At this stage, precision and creativity pay off. Crafted with care, your ninja star will soar with grace!
Sharpening The Edges For Aerodynamics
To improve flight, sharpen the edges of your ninja star. Use a ruler and lightly fold edges to create a crisp, clean line. This enhances the aerodynamics, encouraging smoother, more stable flights.
- Run a thumbnail along folds to sharpen each crease.
- Ensure symmetry for even weight distribution.
Decorative Ideas For Personalization
Personalizing your Paper Frisbee Ninja Star adds fun and identity. Use markers, stickers, or colored tape. Design patterns that reflect your style or make it easy to spot during play.
- Draw bold, striking patterns with markers.
- Apply colorful tape for reinforcement and flair.
- Use stickers to give your ninja star character.
Lightweight decorations maintain flight quality. Heavy additions may disrupt the star’s aerodynamics. Keep decorations balanced for best performance.
Frequently Asked Questions Of How To Make A Paper Frisbee Ninja Star
How To Make A Ninja Power Star Out Of Paper?
Start with two square pieces of paper. Fold them in half diagonally and horizontally. Cut or tear along the crease to make four triangles. Fold corners of each triangle into the center. Overlap two triangles to form the star shape.
Interlock all points seamlessly. Your ninja power star is ready.
What Are The Steps To Make A Paper Ninja Star?
1. Start with two square paper pieces of equal size. 2. Fold each square in half diagonally, then unfold. 3. Fold the corners of each to meet the center line. 4. Flip papers over, folding corners to create a kite shape.
5. Fold each in half lengthwise to reinforce creases. 6. Interlock paper pieces by tucking flaps into pockets. 7. Adjust arms to form the star shape. Your paper ninja star is ready!
How Do You Make A 2 Pointed Ninja Star?
To craft a 2-pointed ninja star, start by cutting two equal squares of paper. Fold each square in half diagonally to make triangles, then unfold. Fold the corners to meet the center crease. Turn the paper over and fold the top and bottom edges to the middle crease again.
Place the pieces over each other, tucking the top layer’s corners into the bottom’s pockets, and form the star.
How Do You Make A Paper Boomerang Ninja Star?
Start with two square pieces of paper. Fold each diagonally in opposite directions to create creases. After unfolding, fold each corner to the central crease. Repeat on both pieces. Overlap the two folded papers, adjusting them to form the star shape.
Connect them by folding tabs into corresponding pockets. Your paper boomerang ninja star is ready to throw!
Conclusion
Crafting your paper frisbee ninja star can be an enjoyable and rewarding experience. With a few simple folds and cuts, you’ve created a nifty toy that embodies the art of origami. Remember, practice makes perfect—so keep honing your skills to impress friends and family with your paper-crafting prowess.
Enjoy throwing your homemade ninja star around, and may it soar smoothly on its paper wings!